
 (This pattern is the property of YarnThrower and may not be reproduced except for one copy for individual use. If you otherwise print or distribute this pattern without YarnThrower's written permission, you are stealing.)
This is a basic child's crew neck sweater. The front, back, and sleeves are all knit separately so that the little knit stitch "vee" parts of the stripe stitches are all "right side up". (If it doesn't bother you to have cuff stripes with the little "vee" parts of the stitches "up side down", or if you will not be making the sweater with striped cuffs, then feel free to pick up the sleeve stitches from the shoulder and knit down to the cuff, reversing all of the shaping.) The shoulders are joined together with a three-needle bind-off.
The intarsia on the front of the sweater may be anything you'd like, or leave it plain. On the sweater pictured, I followed the ideas I learned here (scroll down to the bottom of the page). I did a web search on "Knitters Graph Paper" to find a site which prints customized graph paper. On that site, I input the exact gauge I was getting in my knitting, and I printed out the resulting graph paper. I then went to MS Word, found a font I liked, and printed out a really really big letter directly onto my graph paper. I would recommend printing the letter using a light color, such as yellow, so that the graph paper lines show through well. This results in an instant "chart" for making an intarsia letter on the front of the sweater.
Finished Size: This sweater, as shown, has a 31 inch (circumference) chest measurement.
Materials:
Gedifra Shetland (80% Wool, 20% Alpaca) dark gray with flecks, 4 balls.
Gedifra Shetland (80% Wool, 20% Alpaca) off-white with flecks, 1 ball.
Needles:
Straight or circular size 8 to hold body stitches.
16 inch circular size 8 for collar and top part of sleeves.
Double Pointed size 8 for lower part of sleeves.
Notions:
Gauge: 4.5 stitches per inch
Pattern:
Back:
Cast on 70 stitches.
Working back and forth (in stockinette), purl 1 row, then knit 1 row, then purl 1 row.
This will curl the bottom edge just a little bit.
Then, work ribbing as follows:
Row 1: Using Main Color, *K2, P2* across to last two stitches, K2.
Row 2: Using Main Color, *P2, K2* across to last two stitches, P2.
Row 3: Using Contrast Color, Knit across row.
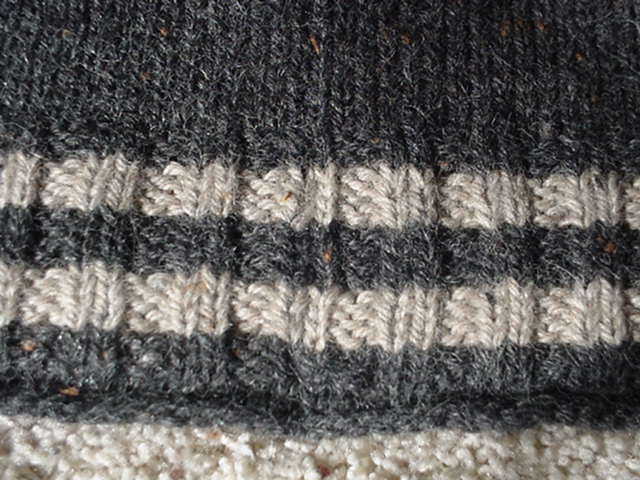 (This is done to avoid obvious "purl bumps" when the color is changed in the midst of ribbing.)
Row 4: Using Contrast Color, *P2, K2* across to last two stitches, P2.
Rows 5-6: Repeat Rows 1 and 2 (except using Contrast Color).
Row 7: Using Main Color, Knit across row.
Row 8: Using Main Color, *P2, K2* across to last two stitches, P2.
Row 9-10: Using Main Color, repeat Rows 1 and 2.
Rows 11-14: Repeat rows 3-6 using Constrast Color.
Row 15: Using Main Color, Knit across row.
Row 16: Using Main Color, *P2, K2* across to last two stitches, P2.
Row 17: Using Main Color, repeat Row 1.
Continuing with Main Color, Purl across next row.
Knit across next row, now working stockinette stitch until work measures 18 inches long (91 rows total stockinette). On last row, knit across 22 stitches and place those stitches on a holder. Bind off the next 26 stitches. Knit across remaining 22 stitches and place them on a holder.
Front:
[If an intarsia design is planned for the front, figure out where the design will be placed. (I planned my design on knitters' graph paper on a 1:1 scale with the actual gauge of my knitted fabric, and then held it up to the already finished back in order to decide at which row I would begin my intarsia.) For the sweater shown, the design (big A) was 30 stitches wide by 40 stitches high. The bottom of it was placed on the front of the sweater beginning with the 30th row of stockinette.]
Work the front the same as the back, except adding intarsia design as desired, and until 80 rows have been worked, ending with a wrong side row. Work measures approximately 2 inches shorter than back at this point.
Begin neck shaping.
Left front:
Knit 27 stitches and place the remaining stitches on holder. Turn work.
Bind off first 2 stitches and then purl across to end of row. Turn work.
Knit across. Turn work.
Bind off first 2 stitches and then purl across to end of row. Turn work.
Knit across. Turn work.
BO 1 stitch and then purl across to end or row. Turn work.
Work in stockinette until left front is the same length as back. Place these 22 shoulder stitches on stitch holder.
Repeat on Right front, reversing shaping to make it symmetrical to left front.
At this point, there should be 22 live stitches for each shoulder, and 16 live stitches remaining in the middle section.)
Attach front to back at both shoulders using three needle bind-offs with right sides together.
Neckline: Using main color, and beginning with stitch immediately to the left of the center back, pick up and knit 14 stitches in back, 10 on left side front, knit across 16 stitches in middle section of front, pick up and knit 10 stitches on right side, and pick up and knit 14 stitches in back to end up at center back.
Pattern Row: K1, *P2, K2* (repeat between ** until last three stitches), P2, K1, using colors as follows:
Rows 1 & 2: Work Pattern Row in MC
Row 3: Knit around in CC
Rows 4 & 5: Work Pattern Row in CC
Row 6: Knit around in MC
Rows 7 & 8: Work Pattern Row in MC
Then work three rows stockinette and bind off LOOSELY!
Sleeves: CO 36 stitches. Joining to work in round, work cuff same as given for lower ribbing.
In first round after ribbing is done, work Increase Row: K1, M1, knit to last two stitches of round, M1, K1.
Continuing in stockinette, increase every 4th row 6 times, then in every 5th row 10 times. (There should now be 68 stitches.) Continue until work measures 14 inches. Bind off. Make second sleeve the same.
Finishing: Sew front and back together beginning at lower edges and for about 10.5 inches. (There should be about 7.5 inches remaining on side edges for sleeve placement.) Sew in sleeves. Weave in all ends. Block.
3 comments:
You make the coolest patterns! Awesome!
Wow, that looks great! Thanks for the pattern. :)
That "print directly onto graph paper" idea is brilliant!
Oh, and the sweater is adorable.
Post a Comment