
A pattern by YarnThrower

My family and I enjoy hiking together, and as the mother, I typically end up being the "pack mule" for our little group. One day I thought to myself, "Why am *I* carrying all of the water bottles?" Probably because I was carrying the only backpack in the group...so I started thinking that I should figure out how to get each of my kids to at least carry his own water bottle. After searching online for a pattern to make some water bottle holders/carriers for my kids to use, I eventually developed my own hybrid pattern based on some of the ideas I found.

Inspired mostly by this pattern which utilizes old jeans, and also the idea of reinforcing the strap found in this pattern, my version results in a carrier which is a little bit larger, has a more robust strap, utilizes an actual pocket from a pair of jeans, and is constructed in a way which allows all of the raw edges to be concealed. I made these for birthday gifts for my nieces and nephew, and they were a huge hit! And, the pocket is the perfect place to put a trail map when hiking!
(This pattern is the property of YarnThrower and may not be reproduced except for one copy for individual use. If you print or distribute this pattern without YarnThrower's written permission, you are stealing .)
- 4 feet of strapping/belting (shown in the photo as off-white in color, but use whatever color you'd like :-)
- 4 feet of grosgrain ribbon which is a slightly smaller width than the strapping/belting material
- 9.5 x 11.5 inch piece of scrap fabric, cut along the grain line
- 9.5 x 11.5 inch piece of denim (can be cut from old jeans), cut parallel to the grain line, to form the "shell" of the water bottle holder/carrier. (I generally make a cut which goes from top to bottom in one of the legs of the pair of jeans, and then open it up/flatten it out to use as my fabric to cut the 9.5 x 11.5 inch piece)
- Optional: Pocket carefully removed from pair of old jeans by snipping the threads which are holding it to the jeans
- Basic sewing supplies, such as coordinating thread (I used white), sewing machine, scissors, needle, pins, etc.
 First, center the grosgrain ribbon on the strapping material and zig-zag stitch along both side edges of the ribbon to secure it. I also zig-zagged along the short edges to keep them from raveling:
 Here are the shell and lining fabrics already cut to be 9.5 x 11.5 inches:
 If you are going to put a pocket on your carrier, stitch the pocket to the shell fabric so that the top of the pocket is parallel to one of the longer edges of the shell fabric, and so that it is centered between the left and right sides of the shell fabric. Allow a space of about an inch between the top of the pocket and the upper edge of the shell fabric:
 Next, fold the shell fabric in half, right sides together, so that the shorter sides of the shell fabric match. Stitch along the longer side of the rectangle formed after folding, creating a tube of fabric. Repeat with the lining fabric, EXCEPT leave an opening of 3" in the middle of the seam:

In this next photo, the area between the points of the scissors is the place where the seam of the lining has been left open for 3": Next, adjust the tube of fabric so that when flattened, the seam which was sewn in the previous step runs down along the center, as shown in the photo below. Stitch along one of the ends of the tube. If you have sewn a pocket to the shell, make sure that you stitch along the edge of the fabric tube which is *closest* to the *bottom* of the pocket. Otherwise, the pocket will be upside-down on the finished product. (Ahem, don't ask me how I know this.) Again, I always zig-zag stitch over the raw edges to keep them from raveling:
 Now, to add some depth to the bag, fold it/pin it as shown in this photo. You will be stitching a straight line located about one inch away from each of the tips of the little triangles formed by the folding. Confusing? Maybe these pictures will help:
 Here's what it looks like after it's sewn:
 Trim off the excess little triangles and zig-zag stitch over the edges to secure them (so they don't unravel):
 The "shell" of the carrier is done. It has a rectangular bottom and can almost stand up by itself :-) Leave it wrong side out and set it aside for now:
 Make a rectangular bottom for the lining using the same method of stitching little triangles, trimming them, and securing the raw edges by stitching over the edges with a zig-zag stitch.Turn the lining "right side out" when done. Here is the finished lining. You can see where the opening is that will be used for turning later on:
 Next, take the strap and pin the *right side* of the strap (which is the side the ribbon was sewn onto) to the *right* side of the shell, with raw edges even, and placing the strap *inside* the tube, as shown in the photo:
 Now, put the lining into the shell, right sides together, and matching raw edges. Stitch through all thicknesses using 1/4" seam allowance. Here I also zig zag stitched along the raw edges to secure them better. This photo shows it all pinned together (before I stitched it):
 After stitching, pull lining fabric out of shell; notice the opening for turning in this photo:
 Turn bag right side out by pulling the strap and the denim shell through the hole in the lining:
 Whip stitch the opening of the lining closed:
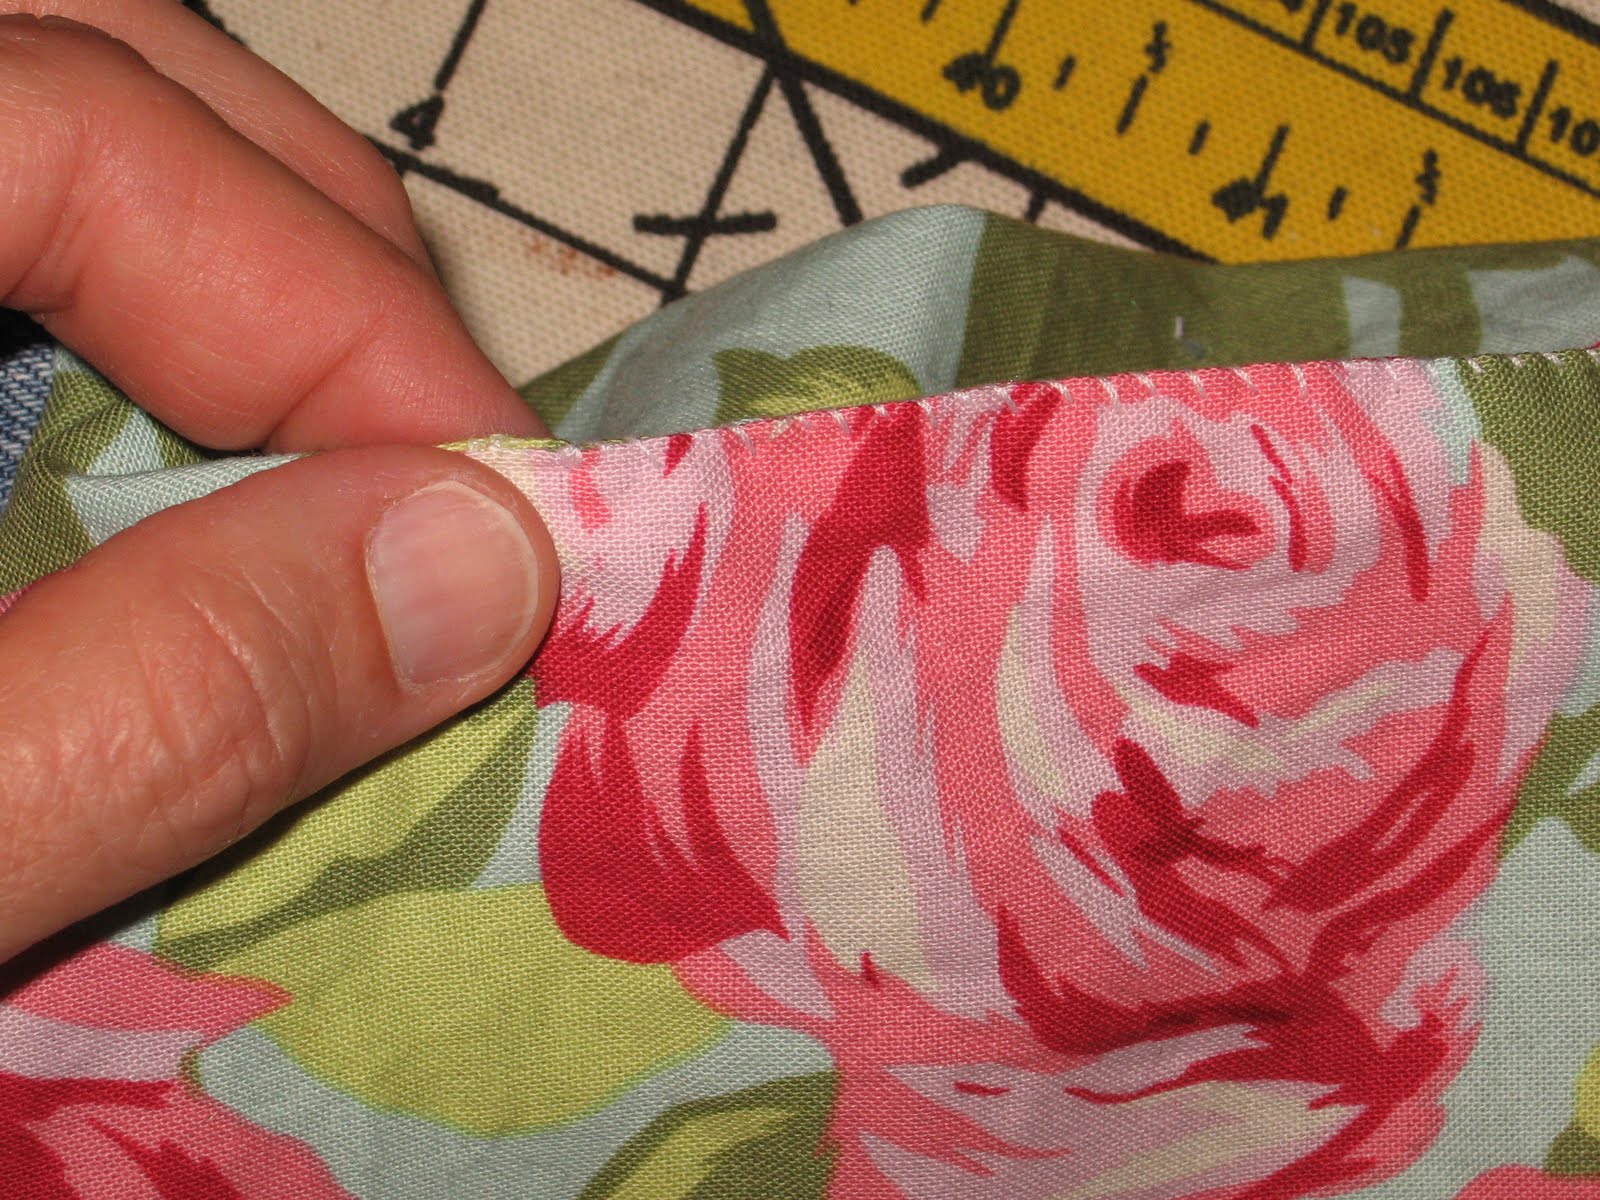
 Tuck the lining inside, making a crisp flat edge around the top of the bag as shown and pinning the top edges in place to hold them in position for the next step:
 Stitch around top of bag close to upper edge, and again 1/4" in from the edge:
 And voila' - your water bottle holder/carrier is finished:
 I hope you have fun with this pattern! As always, I'm interested in your thoughts, suggestions, and especially any corrections you may have to the directions I've given.
 Next, adjust the tube of fabric so that when flattened, the seam which was sewn in the previous step runs down along the center, as shown in the photo below. Stitch along one of the ends of the tube. If you have sewn a pocket to the shell, make sure that you stitch along the edge of the fabric tube which is *closest* to the *bottom* of the pocket. Otherwise, the pocket will be upside-down on the finished product. (Ahem, don't ask me how I know this.) Again, I always zig-zag stitch over the raw edges to keep them from raveling:
 Now, to add some depth to the bag, fold it/pin it as shown in this photo. You will be stitching a straight line located about one inch away from each of the tips of the little triangles formed by the folding. Confusing? Maybe these pictures will help:
 Here's what it looks like after it's sewn:
 Trim off the excess little triangles and zig-zag stitch over the edges to secure them (so they don't unravel):
 The "shell" of the carrier is done. It has a rectangular bottom and can almost stand up by itself :-) Leave it wrong side out and set it aside for now:
 Make a rectangular bottom for the lining using the same method of stitching little triangles, trimming them, and securing the raw edges by stitching over the edges with a zig-zag stitch.Turn the lining "right side out" when done. Here is the finished lining. You can see where the opening is that will be used for turning later on:
 Next, take the strap and pin the *right side* of the strap (which is the side the ribbon was sewn onto) to the *right* side of the shell, with raw edges even, and placing the strap *inside* the tube, as shown in the photo:
 Now, put the lining into the shell, right sides together, and matching raw edges. Stitch through all thicknesses using 1/4" seam allowance. Here I also zig zag stitched along the raw edges to secure them better. This photo shows it all pinned together (before I stitched it):
 After stitching, pull lining fabric out of shell; notice the opening for turning in this photo:
 Turn bag right side out by pulling the strap and the denim shell through the hole in the lining:
 Whip stitch the opening of the lining closed:
 Tuck the lining inside, making a crisp flat edge around the top of the bag as shown and pinning the top edges in place to hold them in position for the next step:
 Stitch around top of bag close to upper edge, and again 1/4" in from the edge:
 And voila' - your water bottle holder/carrier is finished:
 I hope you have fun with this pattern! As always, I'm interested in your thoughts, suggestions, and especially any corrections you may have to the directions I've given.
Warm regards,
Laura (YarnThrower)
